The Sequin Bar is located below the Thread Bar, near the bottom left corner of the application window.
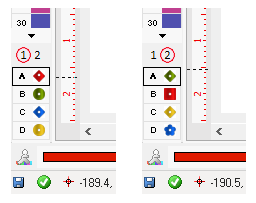
It contains the sequins loaded on the sequin device or devices installed in your machine, which are referred by the numbers 1 and 2 at the top of the bar.
•Click on the numbers to select the active device. The list of sequins will be updated properly, according to the sequins loaded in that device.
•Clicking on any sequin will instruct the software to use that sequin for the object you are editing or for next object you will create.
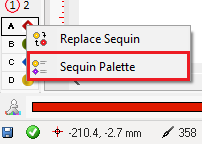
If you right click on any sequin, the small menu allows you to:
•Replace that sequin from any other in the Sequin Library
•Access the Sequin Palette
Replace Sequin
In the Sequin Bar, right click on the sequin you want to replace to open the Sequin Library
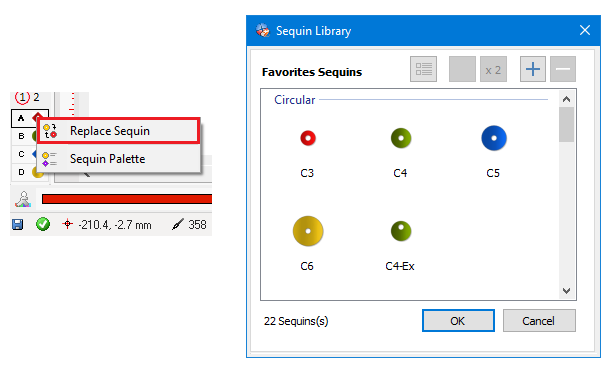
Just select a sequin from the Library and click Ok and it will replace the one in the Sequin Bar. You may also edit the sequins in the Library or create a new one. See Sequin Library for further details.
Sequin Palette
To open the Sequin Palette box, right click on a sequin at the Sequin Bar and select Sequin Palette
Use the Sequin Palette box to:
•Configure the software by defining the sequin device types installed in your machine
•Select the sequins (shape, size, color, etc.) that will be loaded in the sequin devices
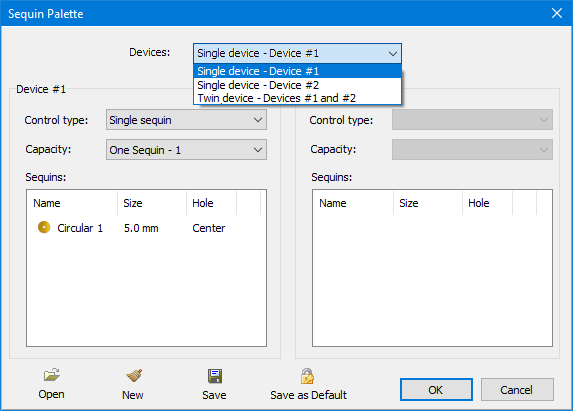
Devices
Select here how many sequin devices are installed in each head of your embroidery machine.
For most machines equipped with just one sequin device per head, no matter if they are installed on the first or last needle, you may use the setting Single device – Device #1. However, some old machines require that you define where the devices are installed; in this case use Device #1 for sequin devices installed on the first needle and Device #2 if the are installed on the last needle.
Device #1 and Device #2 groups
The box contains controls to setup two sequin devices per head, completely independently. Although the most common situation is that both devices are identical, the software supports different sequin device types on each side of the head.
Control type
Simple sequin: This setting should work for all brands of devices that handle only one type of sequin.
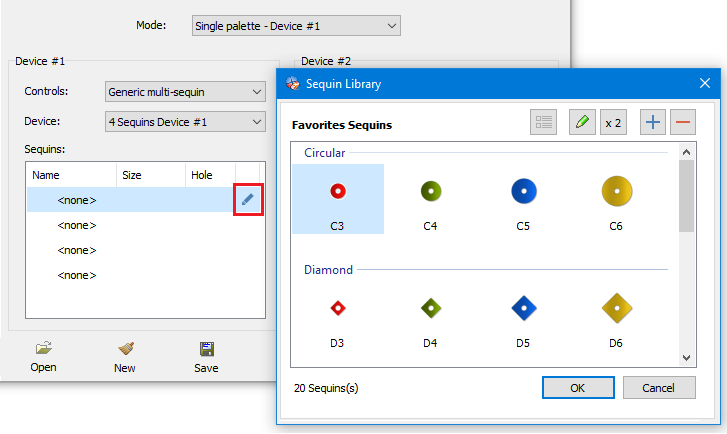
Generic Multi-Sequins: This option fits most brands of multi-sequin devices (2 to 4 types of sequins) that use a generic style control schema (such as the Dahao control used in many Chinese embroidery machine brands)
Tajima multi-sequin: Use this option for multi-sequin devices that use a Tajima style control schema.
Capacity
Setup the number of sequin types that can be loaded in the devices. Note that the Sequins list below this control is updated according to the number of sequins the device can handle.
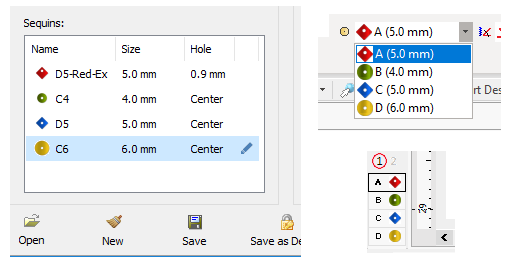
Sequins
This list shows the sequins loaded on the device. For each entry in the list you can select a sequin type from the predefined catalog or you can create your own, selecting shape, size, color, etc.
Hover the mouse over the list and click the edit icon to open the Sequin library. You may select a sequin from the Library, edit any of them or create a new one. See Sequin Library for further details.
Open
Loads a sequin configuration from disk. The information includes all the settings: Devices, Control Type, Capacity and the content of the sequins list
New
This command clears all the settings, allowing you to setup the sequin devices and sequin types loaded on them from zero.
Save
Save all the settings to disk, including your sequin devices configuration and sequin types loaded on them. Saving the settings to disk allows you to create sequins palettes with frequently used sequins types. It will also speed up the process of changing device configurations if you usually create designs for machines with different device types.
Save as Default
Use this command to save your sequin settings as the default configuration. The default configuration is used any time you create a new blank design.
Once you fill all the entries in your sequin list, the Sequin Bar at the bottom-left of your screen and the sequin selectors that appear in all sequin fill modes will be automatically updated.
|
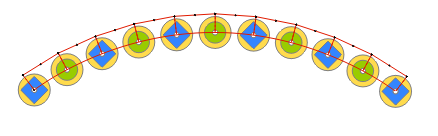
About the order of your sequin types Some sequin devices are able to drop multiple sequins at a time, securing them with a single fixing stitch style. Using this technique you may get effects where the different sequins are arranged stacked on each other.
The “stacked “ type sequin devices usually limit which sequins can be arranged on top of others, according to the order in which they are loaded on the device. On these devices, the sequins must be dropped in the order bottom-top of the list. So, the sequin at the last position in the Sequins list will always remain in the bottom most position of the stack. This order must be considered at the time to load the devices. |
Sequin Library
The Sequin Library contains some predefined sequins that you can use as they are or that you can edit to fit your needs. The Sequin Library also appears when you right click on a sequin at the Sequin bar and select Replace Sequin.
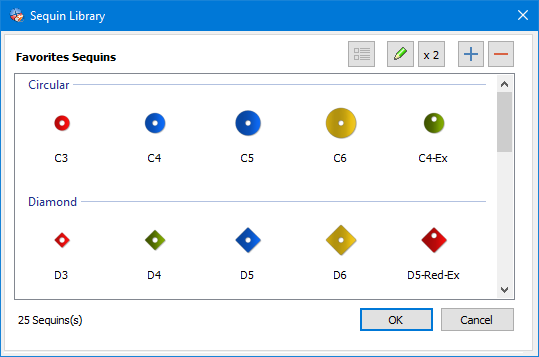
Use the small toobar at the top to: (numbered left to right)
1- Change view mode between icons and list
2- Edit the selected sequin
3- Duplicate the selected sequin (so you can create a new sequin based on the selected one)
4- Add a new sequin
5- Delete selected sequin
When you use the Edit or Duplicate sequin command, the Sequin Editor dialog appears
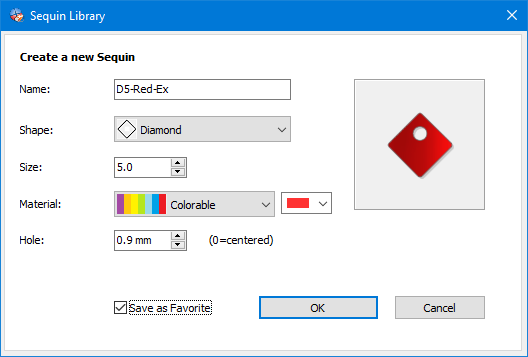
Name: Fill in this box with a name to identify your new sequin Shape: Select the shape for your new sequin. Options include circular, square, diamond, several stars and flowers, etc Size: Set the overall size of your new sequin. Note that the value entered here corresponds to the diameter of a circle where the sequin fits exactly Material: Use this list to select the option that best suits the look you want for your new sequin. The Colorable option lets you also select the color of the sequin Hole: This value defines the distance between the center of the hole regarding the center of the sequin, thus, a sero value means that the hole is located at the center of the sequin shape Save as Favorite: Checking this mark your sequin will be saved as favorite and will appear within the Sequin Library. |
|