A block is a set of objects containing 1 single object or several objects, of 1 single object type or several object types, of 1 single decoration specialty or several decoration specialties simultaneously. There are several ways to select a block. |
Select object by object
|
1.Click on EDIT OBJECT function on the MAIN toolbar to activate the Object Editing Mode. 2.Select the first object in the workspace by pressing the mouse left button over the object. A rectangle containing the object (boundary rectangle) is displayed. 3.To add an additional object to the block, press the mouse left button while holding the "Ctrl" key. The boundary rectangle will include all the objects added to the block. 4.Repeat the previous step to add all the required objects to the block. The block is defined. |
Select a range of objects
|
How to select a range of consecutive objects to define a block. This function only works from the Document Map and the Object Sequence. 1.Click on EDIT OBJECT function on the MAIN toolbar to activate the Object Editing Mode. 2.Click on the first object of the range on the workspace. 3.Press and hold the "Shift" key. Then, click on the the last object of the selected range. The block is defined. 4.A block will be created containing all the existing objects between the first selected object to the last selected object, including both of them. |
Select by Rectangle
|
1.Click on the arrow next to the EDIT OBJECT function on the MAIN toolbar to activate the Object Editing mode and open a drop-down menu. 2.Click on "Select by Rectangle". 3.In the workspace, press and hold the mouse left button in the corner of an imaginary rectangle that encloses all the objects of the block. 4.Drag the mouse to the opposite corner of the rectangle to enclose the objects you want to select. 5.Release the mouse button. The block is defined. |
Select by Outline
|
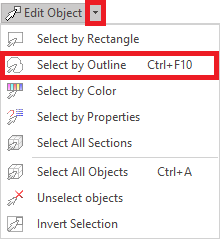
1.Click on the arrow next to the EDIT OBJECT function on the MAIN toolbar to activate the Object Editing mode and open a drop-down menu. 2.Click on "Select by Outline". 3.In the workspace, click on the mouse left button in any point of an imaginary irregular shape that encloses all the objects of the block. 4.Click on the mouse left button in all the consecutive points of the shape that encloses the objects. 5.Click on the "Enter" key to close the outline and define the block. You can also confirm the outline with the OK button on the context menu (mouse right click). |
Select All Objects
|
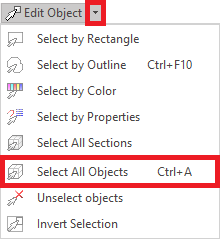
This function selects all objects of any decoration type. 1.Click on the arrow next to the EDIT OBJECT function on the MAIN toolbar to activate the Object Editing mode and open a drop-down menu. 2.Click on "Select All Objects". |
Invert Selection
|
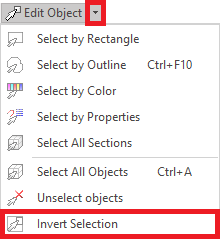
When a block is defined, use this tool to define a new block containing all the objects except for those objects contained in the former block. 1.Click on the arrow next to the EDIT OBJECT function on the MAIN toolbar to activate the Object Editing mode and open a drop-down menu. 2.Click on "Invert Selection". |
Unselect Objects
|
Use this tool to clear the current selection. It will not delete the objects, it'll just unselect them. 1.Click on the arrow next to the EDIT OBJECT function on the MAIN toolbar to activate the Object Editing mode and open a drop-down menu. 2.Click on "Unselect Objects". |
|
This article explains how to select a block of objects and how to apply block editing functions to the selected blocks, but this is not the only way this application offers to perform those actions. You can also select a block through the Document Map on the Object Manager panel. The Document Map contains the complete list of objects, then you can select the objects of the blocks from that list. Then, you can also select a block editing function to apply through the context menu available with a mouse right click. |


