A stitch block is just a group of stitches. You can select any stitch block to work on all that group of stitches at the same time.
A stitch block can contain consecutive or non-consecutive stitches (which can be interpreted of several groups with consecutive stitches).

|
It is very important to understand the difference between a stitches block and an embroidery object:
•The embroidery object is the base entity to create new embroidery designs. The stitches produced by the object are the result of the properties of that object. In other words, all those stitches are simply consequence of the object definition. •The block of stitches are a group of stitches that have nothing in common, there is no entity that groups them. They are just part of a group only because an user decided to work with all those stitches at the same time. |
The steps to work with stitch blocks are:
1.Activate the Stitch Editing mode
2.Select a Block (group of stitches)
3.Use the Block for any action (block functions)
Activate the Stitch Editing Mode
Click on EDIT STITCHES on the MAIN toolbar, or press the F12 key.
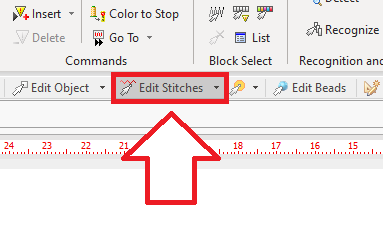

|
If you open an embroidery design file (expanded/machine format), the Stitch Editing Mode will be loaded automatically.
|
Select Block
There are several ways to select blocks, including the standard selection tools (by range, by color, outline on the graphic view, etc.) and the advanced selection tools (they include patterns recognition).
When the Stitch Editing mode is activated, the Stitch Editing toolbar is displayed.


|
Select all the stitches.
A block with the entire design will be created.
|
|

|
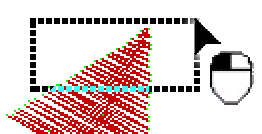
Select all the stitches are totally inside a rectangle.
1.Press and hold the mouse left button on the first corner of the rectangle. 2.Without releasing the button, move (drag) the mouse cursor so that the rectangle encloses the stitches you want to select. |
|
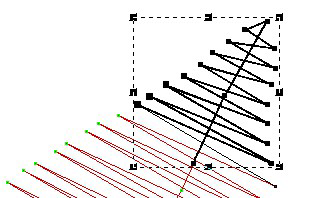
1.Release the mouse button. A block with the selected stitches is created, this block is highlighted. 2.If this block has several groups with non-consecutive stitches, the Stitch Block List shows the list of those non-consecutive groups of stitches. Keep the groups you want and unselect the other groups. Then, click OK. |
|
|
|

|
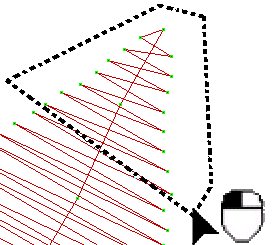
Define a block that contain the stitches that are included inside a defined polygon.
1.Click on the mouse left button on the first point of the polygon. 2.Clicking on a sequence of points that define the polygon. The points they will connect each other, creating the polygon. |
|
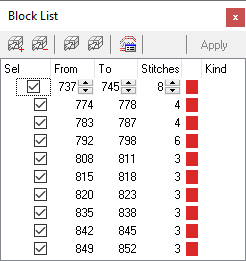
1.Once the polygon is completely defined, press the Enter key. A block with the selected stitches is created, this block is highlighted. 2.If this block has several groups with non-consecutive stitches, the Stitch Block List shows the list of those non-consecutive groups of stitches. Keep the groups you want and unselect the other groups. Then, click OK. |
|
|
|

|
Define a block of consecutive stitches, by indicating the first and last stitch of the block.
1.Click on the first stitch of a block you want to create 2.Click on the last stitch. 3.Press the Enter key to create the block. |
|

|
Define a block with consecutive stitches, separated by machine controls.
1.Click on a stitch in the working window. A block is created, including all the stitches between the selected one and the previous machine and between the selected one and the next machine command. |
|

|
Define a block with consecutive and non-cosecutive stitches of the same color.
1.Click on a stitch of the color you want. A block is created, including all the stitches of the same color (consecutive and non-consecutive). |
|

|
Unselect the active block.
|
|
Once you have defined a stitch block, you will be able to add a new group of stitches to it.
1.Pick a selection mode. 2.Press and hold the CTRL key. 3.Selection a new block of stitches. The new stitch block will contain the stitches of the former block and the last one. You can repeat this process as many times as required.
|

|
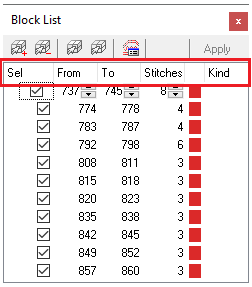
When selecting a block of stitches, it is possible that the block contains groups of non-consecutive stitches. In that case, the Block List box is opened.
You can also show or hide the Stitch Block List from the "List" button on the Stitch Editing tooltab.
|
The Stitch Block List contains a list of the groups of consecutive stitches, the order number of the first and last stitch of the group, and the number of stitches.
You can then decide which groups of stitches to keep in the block and which groups of stitches should be discarded. That is as simple as marking or unmarking the check box on that list.
While you mark or unmark each group of stitches, the block will be also updated on the workspace (then you can easily identify each group).
The Stitch Block List includes a small toolbar:

•Add Range: Add a new range of stitches •Delete Range: Delete the selected range from the block •Select All: Includes all the design stitches •Unselect All: Unselect the active block •Stitch Patter Recognition parameters |
|
|


